Hello, this is my third MX5 after a break of a few years whilst I restored an old Karmann Ghia. I've had a mk2 & a mk3 but always fancied a red mk1 
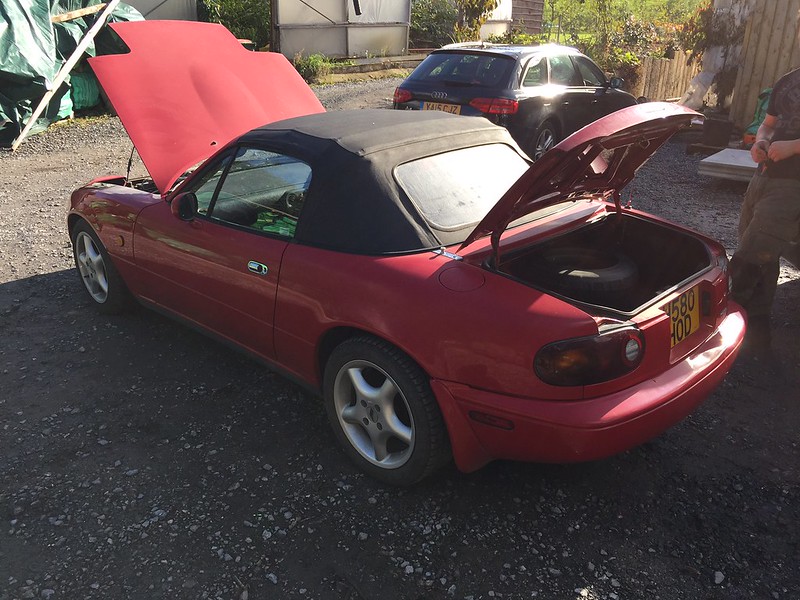
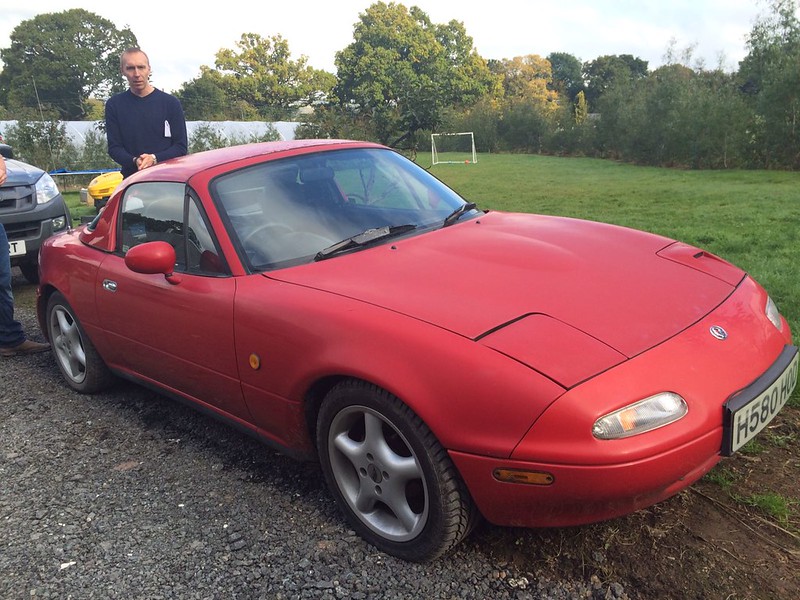
It's a '91 Eunos Roadster which I picked up as a project car for myself to tinker with this winter. I'm hoping there's not too much major to address the sills and arches all look really solid, ironically this is the fifth car I viewed all of them a lot more expensive than this but all had signs of rot or bad previous repairs to the sills.
The vendor was a nice chap but didn't have much of a clue about the car so hadn't advertised any of the extras that I found when I viewed it.
![29968788444_43d7f8bc02_c.jpg 29968788444_43d7f8bc02_c.jpg]()
![29858662713_54bd790363_c.jpg 29858662713_54bd790363_c.jpg]()
![30564177446_579682495b_c.jpg 30564177446_579682495b_c.jpg]()
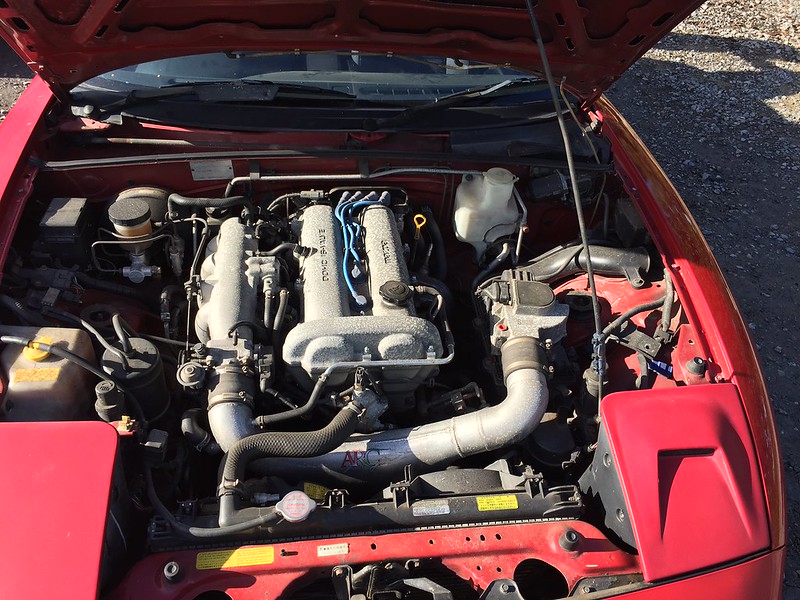
So far I've found it has an ARC chamber, stainless steel exhaust manifold and I believe the whole system (although it was a bit hard to tell in the mud!) a quickshift is fitted (which I hate), plus some sort of adjustable suspension (you can see dials on the bottom of the shocks) Aircon seems to work but time will tell, interior is a bit dirty but not ripped or torn, plus the vendor threw in the hardtop which is a little rough round the edges but a bonus.
The car hasn't had much use (or love) over the last year that the previous owner had it, but seems that owners prior to that have looked after it well.
Initial tasks are:
- A tappety engine turned out to be low oil which seems to have gone away by it topping up with oil and giving it an Italian tune once warm ;-)
- A few of the belts seem to intermittently squeal - so will work my way through replacing those
- General oil change, plugs, service etc.
- Unknown age of cambelt - plan to change this along with water pump, various gaskets, camshaft & crank seals etc
- There's a suspension rattle (quite a lot) but the steering & suspension seems to be quite taut so I suspect it's the ARB droplinks or similar - investigate &repair where needed
- Replace quickshift with normal one
- Paint - give the whole car a good mop to get rid of the classic red paint oxidisation
- Hood - seems sound but the rear has a loose flap that needs attention - if it doesn't leak I will leave it alone until the weather gets warmer then I will have a go at replacing if necessary
- Drivers door has slightly sagged so needs adjustment, ordered some of the solid door bushings to go on at the same time
- Front number plate plinth is cracked - may replace or even move to below the grill
- Replace stereo with something that doesn't have buttons the size of grains of sand and that I can actually read without having to pull over and squint at it. (honestly who designs aftermarket stereos these days? Makes me wonder if they have ever driven a car)
- Replace the naff 15" wheels and ditchfinder tyres with a set of Panasport 8-spoke wheels I have squirrelled away in the garage
- Fit front & rear lower chassis braces (need to check it doesn't have them first)
No doubt after getting to know the car in the next couple of weeks there's be more…
It's a '91 Eunos Roadster which I picked up as a project car for myself to tinker with this winter. I'm hoping there's not too much major to address the sills and arches all look really solid, ironically this is the fifth car I viewed all of them a lot more expensive than this but all had signs of rot or bad previous repairs to the sills.
The vendor was a nice chap but didn't have much of a clue about the car so hadn't advertised any of the extras that I found when I viewed it.


So far I've found it has an ARC chamber, stainless steel exhaust manifold and I believe the whole system (although it was a bit hard to tell in the mud!) a quickshift is fitted (which I hate), plus some sort of adjustable suspension (you can see dials on the bottom of the shocks) Aircon seems to work but time will tell, interior is a bit dirty but not ripped or torn, plus the vendor threw in the hardtop which is a little rough round the edges but a bonus.
The car hasn't had much use (or love) over the last year that the previous owner had it, but seems that owners prior to that have looked after it well.
Initial tasks are:
- A tappety engine turned out to be low oil which seems to have gone away by it topping up with oil and giving it an Italian tune once warm ;-)
- A few of the belts seem to intermittently squeal - so will work my way through replacing those
- General oil change, plugs, service etc.
- Unknown age of cambelt - plan to change this along with water pump, various gaskets, camshaft & crank seals etc
- There's a suspension rattle (quite a lot) but the steering & suspension seems to be quite taut so I suspect it's the ARB droplinks or similar - investigate &repair where needed
- Replace quickshift with normal one
- Paint - give the whole car a good mop to get rid of the classic red paint oxidisation
- Hood - seems sound but the rear has a loose flap that needs attention - if it doesn't leak I will leave it alone until the weather gets warmer then I will have a go at replacing if necessary
- Drivers door has slightly sagged so needs adjustment, ordered some of the solid door bushings to go on at the same time
- Front number plate plinth is cracked - may replace or even move to below the grill
- Replace stereo with something that doesn't have buttons the size of grains of sand and that I can actually read without having to pull over and squint at it. (honestly who designs aftermarket stereos these days? Makes me wonder if they have ever driven a car)
- Replace the naff 15" wheels and ditchfinder tyres with a set of Panasport 8-spoke wheels I have squirrelled away in the garage
- Fit front & rear lower chassis braces (need to check it doesn't have them first)
No doubt after getting to know the car in the next couple of weeks there's be more…


