Mazda MX-5 Miata banner

Long Time In The Making Build Thread

45K views 119 replies 37 participants last post by  crayons  
#1 · (Edited by Moderator)
So... I`ve been lurking on here for a while as a guest and now a member so thought it was about time I got my build thread started

My missus had a 1.8 Eunos a few years ago and it was a hoot to drive, it just needed more power. Since then I`ve come up with a fairly comprehensive build plan which aims to follow a few simple rules.

- Budget, the project itself will be done on a limited budget however I am also a firm believer in the `do it once, do it right` mentality so I wont be scrimping as such.

- Form over function, every change will have a reason

- Fix-a-bility, there will be very limited custom/one off parts on the build. If I blow an engine I want to be able to be back driving quickly and for the least amount of money, so no built costly engines however oe add ons/changes will be used.

I want to build a car that has no right to embarrass machinery that it will end up doing, it wont cost the earth but people will always take the mick for it being`just an mx5`

I picked up a rust free semi compete rolling shell from Autolink in July, then went on holiday so it sat not doing much

This is how I picked it up

IMAG0816.jpg

IMAG0817.jpg

I started to strip it even further in my garage

IMAG0062.jpg

Organising a few parts

IMAG0057.jpg

However space was at a premium so myself and 3 guys from work have rented a unit on the same estate as BBR, even met Brodie the other day. Very cool guy and happy to talk for hours!

And this is what I`m left with

IMAG0147.jpg

IMAG0147.jpg
 
#27 ·
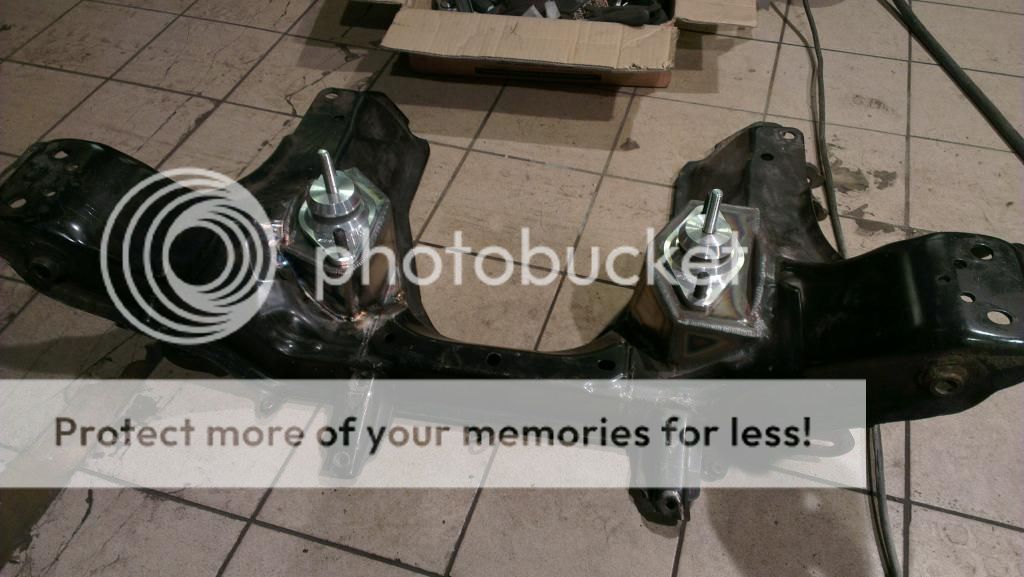
That's some tidy welding on the engine mounts! What are you using to weld?
Cheers mate, I`ve got a little invertec 200 (I think) air cooled TIG welder. I`m either going to rent or buy a water cooled one for when I do the cage as the duty cycle on the water cooled is low, plus I cant weld Ali with this either. Just a 3.2mm tungsten, 1.2mm A15 rod and pure argon on circa 10l/min. Does me well although if I was being critical of it the arc control could be better
 
#31 · (Edited by Moderator)
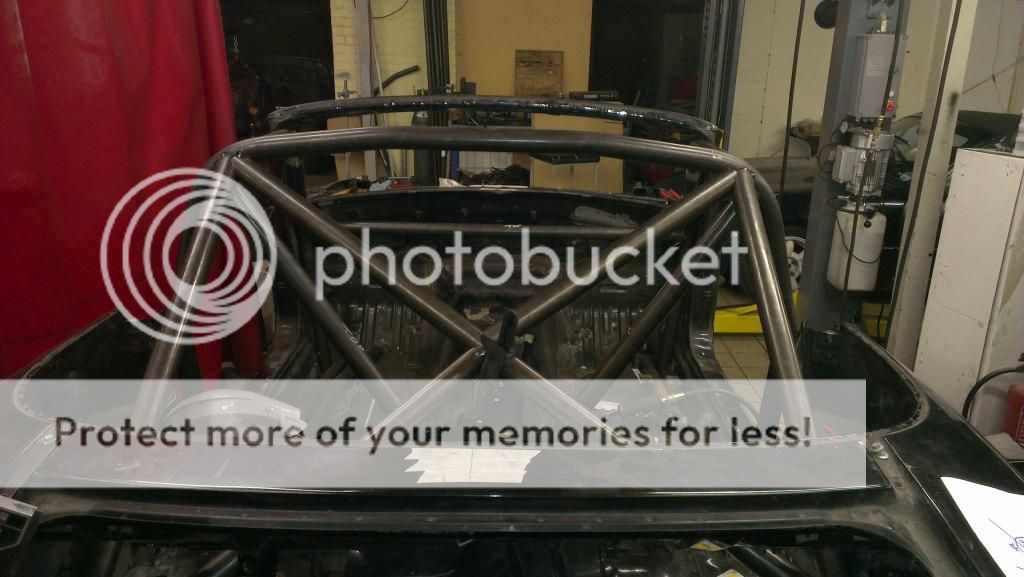
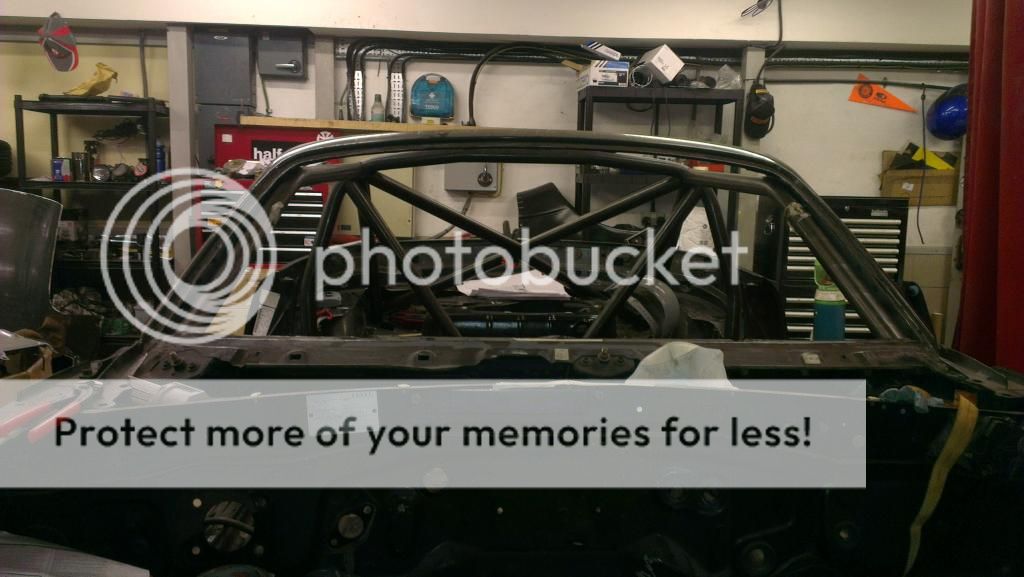
Only a quick update I'm afraid. Manage to spend about 6 hrs on the car yesterday as I'm a family do. The rear of the cage is almost complete, bar the harness bars.

IMAG0750.jpg

IMAG0752.jpg

Forgot this pic, the main hoop brace is complete. I've attached it to the tunnel as it gives more room behind the seats than if I had gone corner to corner. I've checked with various people and it still conforms to msa regs

IMAG0746.jpg

It needs the harness bars adding and some final trimming around the main hoop once the welds for the other joint bars are in but its another big piece of the puzzle done.

I hope to add the roof bars in this week and measure up the gutted doors so I can cad up the door bars and get them bent. Then ill actually have to start welding the damn thing![emoji3]
 
#32 ·
So as usual its been a while since my last update. Work has been royally getting in the way of any decent progress. I`ve had a few intermittant saturdays and evenings that I`ve been able to work on the cage, combined I`ve got alot done and the welding has begun

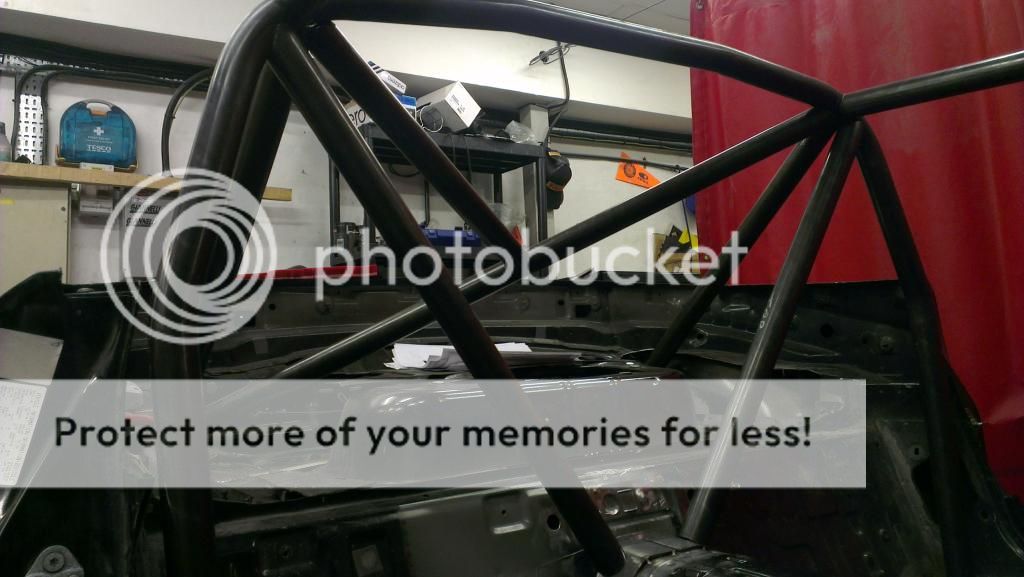
I got the triangulation bars installed that tie into the strut tops and got the front structure welded. It was a bit of a faff as the header bar tucks into the top of the windscreen surround but its a nice near solution

IMAG0786.jpg

IMAG0789.jpg

IMAG0788.jpg

I also measured, in a very precise manner, using a combo of string, digital protractors and an assortment of rulers, the angles and lengths of my door bars, drew them up in cad and got them bent. They turned out spot on and I`m proper happy with them

IMAG0824.jpg

I then spent a very long time getting the to match up side to side, both in angle and with the vertical tubes

IMAG0825.jpg

IMAG0827.jpg

Still alot of welding to do and a few pics missing, the doors are gutted and now weigh around 6.5kg, still alot but the work left to remove g`s isnt worth it at the moment

Hoepfully alot more progress this weekend and I wont leave it so long between updates next time
 
#37 ·
So..... I`ll just leave this here

IMAG0833.jpg

Clutch porn!! Picked this kit up in the states on my recent trip, Titan Motorsport were massively helpful in sorting out the hybrid kit and had it sent to the hotel ready for me to pick up. Very simple and hassle free, plus a damn site cheaper than getting the same set up in this country. It should also handle everything I throw at it. Just need to sort out the concentric hydraulic release bearing and get the spacer machined up when I have my engine

It was a bit more slow and steady progress over the weekend, welding all the door bars took way longer than planned, getting in behind places meant a half out of moving the cage in a very limited space (with the aid of ratchet straps) all to weld about 10mm of seam and then have to move it again. Got there in the end tho, behind the a piller was the biggest pita

IMAG0838.jpg

IMAG0835.jpg

I`m getting some sheet bent up this week for the gussets which should allow me to crack on with the cage this weekend
 
#40 ·
Titan Motorsport!? They made some evil Supras as i'm sure you know. On that note is it a 2JZ going in? ;) Awesome work man, admiring your fabrication skills big time!
Yeah they made some savagely quick supra`s, have you seen the Ekanoo Racing Supra, that thing is mental!

No 2JZ, or even 1JZ, here I`m afraid. All will be revealed soon!
 
#46 ·
Holy crap where does the time go. I had very little progress before christmas, work got busy and it seemed every free weekend was taken up with menial tasks like christmas shopping and weddings!lol.

I finally got sick and tired of lugging my welder and x47 gas bottle around the workshop so I made a little trolley for it. I`m so glas I did this as I`ve recently switch to an even bigger bottle which is nealry 6ft tall!

Couple of cheeky weld shots

IMAG0890.jpg

IMAG0891.jpg

IMAG0894.jpg

and all finished

IMAG0899.jpg

I`m going to add a removable 2 tier tray above the welder so I can store the foot pedal and collets/tungstens etc too

Then it was back onto finishing the subframe and engine mounts. I dont know why but I did one mount then put off doing the other side for some time. I remounted the engine and used the lower half of the column, albeit the wrong way round to give me a clearance envelope. If anyone has the lower UJ they want to sell me it`d be very much appreciated, I think I stupidly left my one on the rack when I sold it

IMAG0897.jpg

Then my phone died and I`ve got no `in production` pics, just the finished item

IMAG0904.jpg

IMAG0906.jpg

I also stamped up the mounts so I know which side goes where (shouldnt matter, but they are ever so slightly different)

IMAG0910.jpg

Then it was onto the engine side of the mount. There is very little space here as the steering shaft and a water pipe for the engine all try and run in the same vicinity and then I had to fit the engine mount.

Again I only have a few weld shots and the finished product, I got carried away whilst making it and forgot!

IMAG0916.jpg

IMAG0919.jpg

IMAG0920.jpg

So thats it, engine is in

IMAG0923.jpg

manifolds fit (although both will be remade so the orientation of the turbo and inlet are correct)

IMAG0926.jpg

plenty of space for a 3" downpipe too

IMAG0927.jpg

Then in typical fashion when I had a weekend of TIG planned, I ran out of argon, balls!! So i broke out the mig set and started stitch welding the front end. I attacked everything with a wire wheel and scraper before I started but the seam sealer trapped in the panels still spat every know and again. It was one of the most hateful few hours I spent on this car, sat in a wheel arch at a funny angle in full PPE was not fun! I took circa 3kg of crap out of both front arches, the seam sealer in places was 10mm thick! I`ll be reapplying it but not in that quantity!

All nice and shiney

IMAG0937.jpg

I hammered some of the flanges together so that there wasnt large gaps to fill and then hit it with the mig

IMAG0936.jpg

And finally, that parts I`ve waited ages to get, mainly because no bugger will make me some ( got my mate ian to do it in the end, life saver) and the ones that are sold by the generic places are very long and narrow and full of holes!

Everyone loves a good gusset! I`ll trim these shortly and fit a couple of bosses to mount the hardtop

IMAG0939.jpg

IMAG0941.jpg

Loads more planned this weekend, the cage should be finished and more seam sealer should be gone!!
 
#49 ·
Awesome build thread Dan, I remember you telling me about your plans when you picked up the widearch 5, if it's still the same then I can't wait to see it finished. Subscribed. :thumb-up:

How's the old Greenie treating you? :)
 
#50 ·
It is indeed the same one. Wide arches are patiently waiting to go on, bit of trimming and welding of the rear arches first but it won't be long. The green beast is treating me (well the missus) well thanks. Sailed thru its mot and just wrapped it satin black. Couldnt be bothered spraying the front arches and repairs to the rears so wrap was easier!
 
#51 ·
Everyones favourite time, UPDATES!!

So the middle of Feb is upon us and I`ve no idea how I got here, the past 6 weeks have flown by. I`ve been collecting and ordering bits and have been doing lots and lots of head scratching. I got to the stage where the seat, pedals and column needed mounting.

Oh yeah, pedals. I ordered a kit from OBP as it was a decent starting place and didnt break the bank like the tilton/ap offerings did. I also needed to tweak it (grind bits off) to get it to fit

IMAG0951.jpg

For the cost I`m very impressed, so we will see how it performs

I also needed to mount the rear bumper after having removed a load of structure to make way for the exhaust and diffuser, so a quick cad drawing and a few holes and bending later and I had 2 of these

IMAG1001.jpg

I`ve added a couple of rivnuts to the body and to the bracket and it fits beautifully

So back onto the cockpit saga. I had no definative datum as the seat/pedals and column were all floating at this stage so I set the pedals in the ideal position, then figured out where the column went and finally the seat. It took many many many (I could go on) iterations of this and lots of tweaking, I must have been in and out of the seat 30+ times but it was worth it. Now that I had the position I started making the upper column mount, I tried to use the OEM stuff but it just wouldnt fit

I`ve used rose joints for both the mounts as means the dont have to be perfectly alligned like a ball bearing would need to be to still function.

I cut some tubes and tacked together the frame work

IMAG1002.jpg

then welded most of it

IMAG1004.jpg

before fitting it back to the car and triple checking the position before tacking it to the dash bar

IMAG1010.jpg

I forgot to take pics of the lower mount in the making but its all come together very nicely

IMAG1013.jpg

IMAG1014.jpg

IMAG1012.jpg

I havnt fully welded it in yet as I want to come back to it with a fresh pair of eyes and sit in the seat without having sat in it loads during the day. my perception of level/felt right was waining.
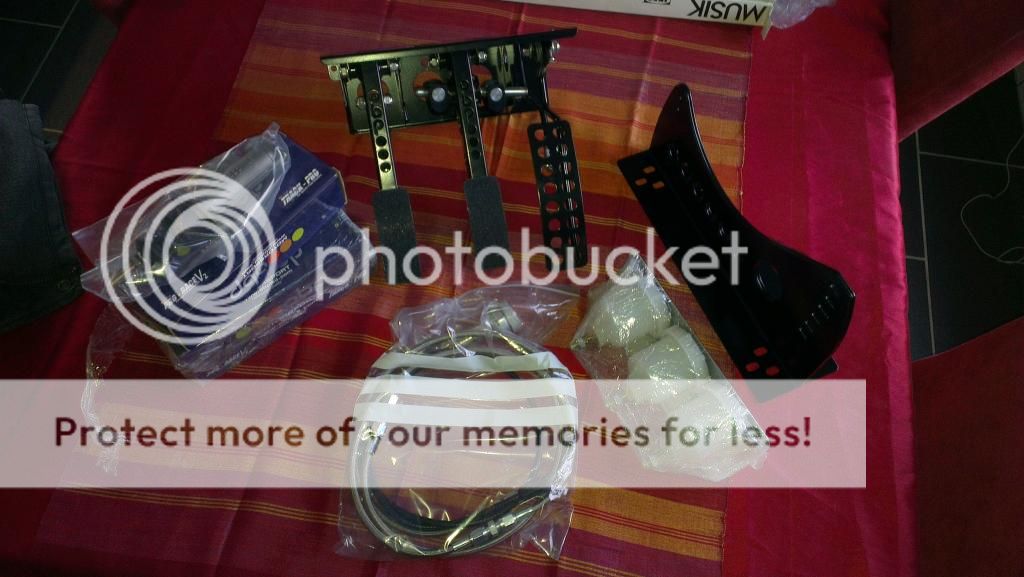
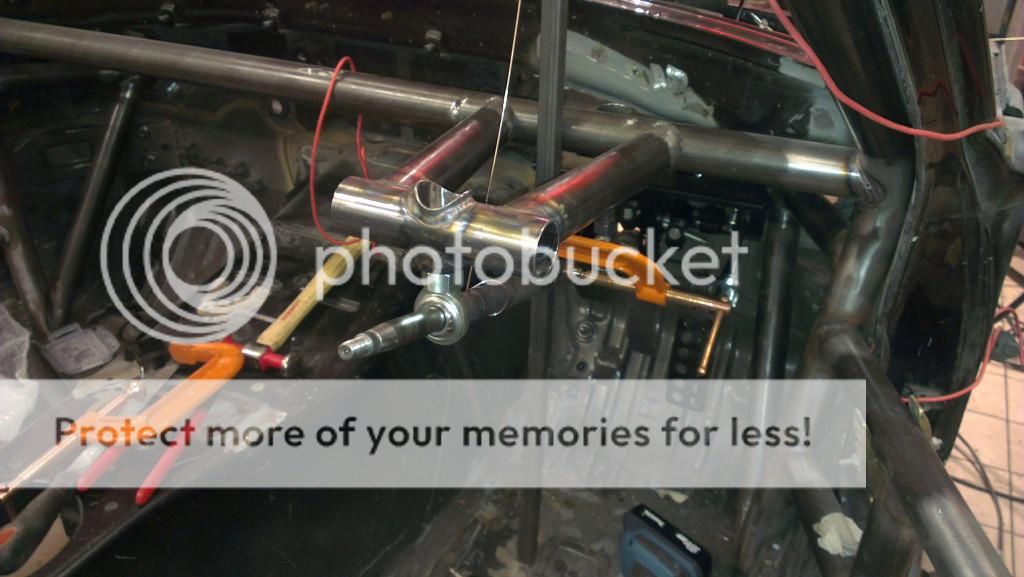
I`m off on holiday next week and I`ll be picking up a full suspension bush kit, hydraulic release bearing and all the flanges to make the inlet & exhaust manifolds plus the downpipe!