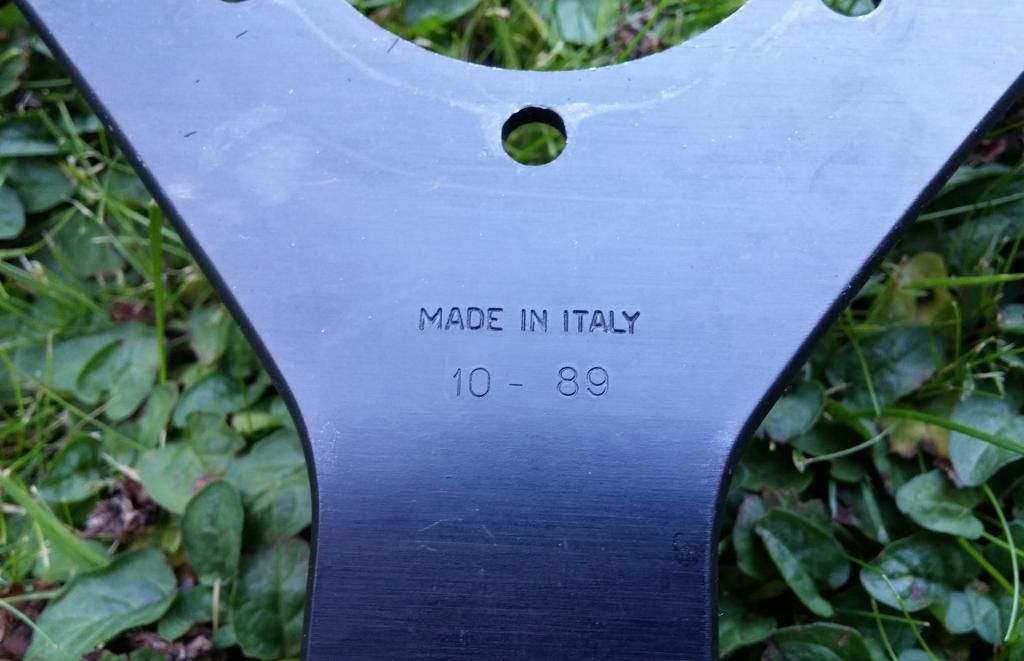
Many of our cars are getting on for 20+ years old now and the leather wheels start to look pretty tatty, Momo standard wheels have a date code stamped on the back, the one I'm refurbing here is 25 years old next month. Refurbing your wheel is surprisingly easy to do and only costs around £20 in materials, although bear in mind it's not a 'quick fix', it's a time-consuming job. This one took two days, mostly waiting for coats to dry.
![Firstleatherrefurbpic1_zps9ac0068e.jpg Firstleatherrefurbpic1_zps9ac0068e.jpg]()
To do this job you have to take the wheel off the car.
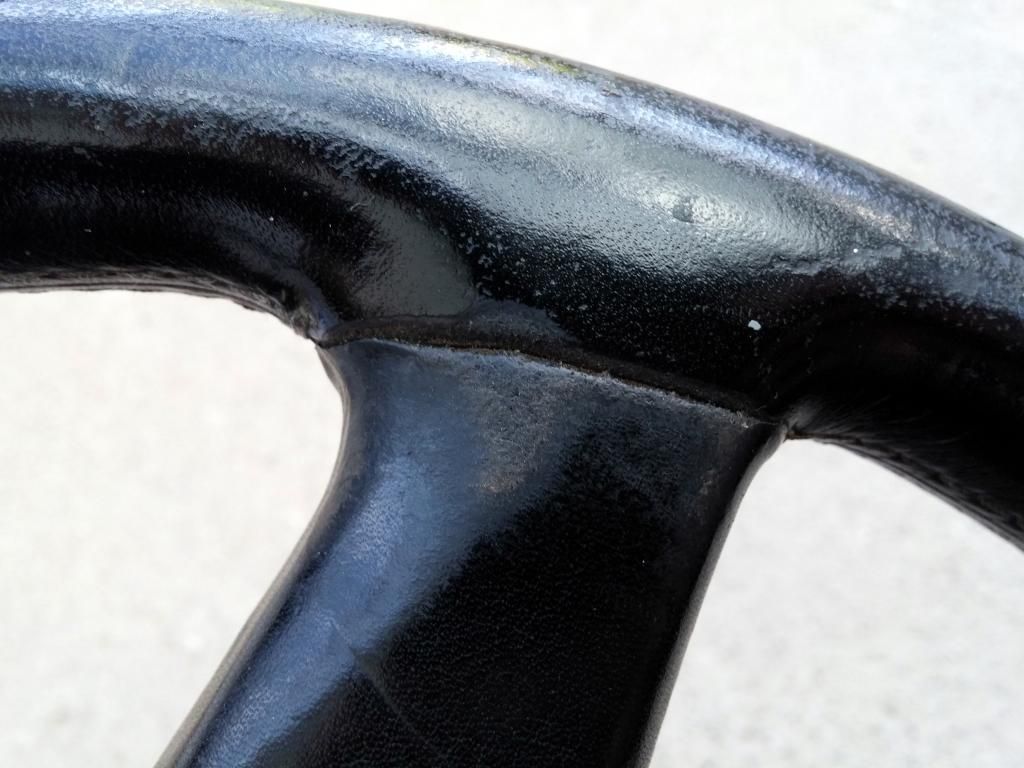
Here's my wheel to begin with, I bought it for £25 to practice on. It has all the usual gouges scratches and dents you'd expect, it's also worn very shiny and the surface was missing altogether in places.
![Firstleatherrefurbpic5firstone_zpscc7e0d Firstleatherrefurbpic5firstone_zpscc7e0d]()
![Firstleatherrefurbpic4_zps7bc7ce12.jpg Firstleatherrefurbpic4_zps7bc7ce12.jpg]()
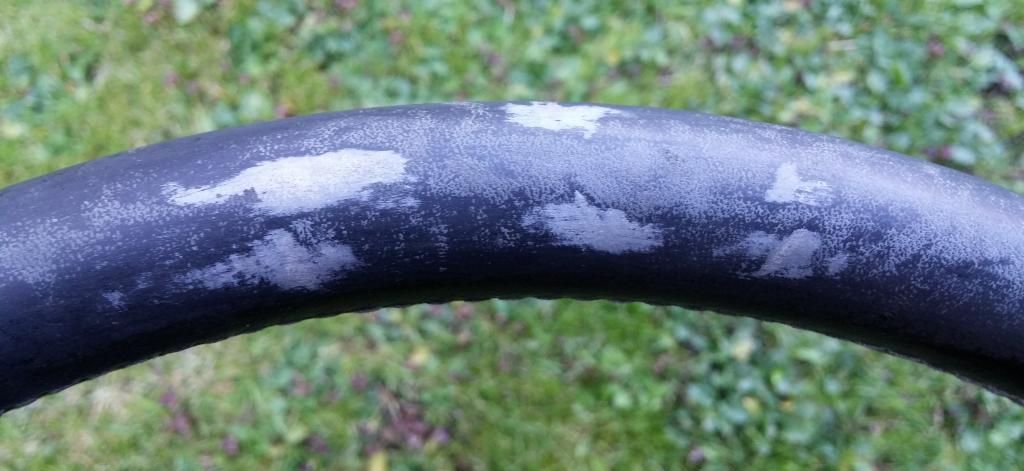
First thing to do is to sand the existing surface back, it seems pretty strange sanding leather to begin with but all leather you see is 'painted' and refurbing it is a lot like doing bodywork. i.e. you sand, fill, sand, paint. You don't have to take all the surface off completely we're just aiming for smoothness.
I started with 800 grade paper, you don't want to scratch the surface deeply with coarse paper as it'll 'chunk up' and be rough, instead sand lightly and try to get it all smooth and even. Always sand leather dry.
Sanding brings out further imperfections and some small dents you can't see normally.
![Firstleatherrefurbpic7_zps89f80b1f.jpg Firstleatherrefurbpic7_zps89f80b1f.jpg]()
When it's all sanded and you can see the dents clearly, use some leather filler to fill the dents in. This is like normal filler except it always stays as flexible as the leather, clever stuff. http://www.amazon.co.uk/Leather-Repair-Filler-Compound-Cracks/dp/B00BNT6UME
![Firstleatherrefurbpic8_zps26ef2ad4.jpg Firstleatherrefurbpic8_zps26ef2ad4.jpg]()
Sand this down and blend it into it's surrounding surface.
Up the grade of the paper you're using for a final sand, I ended up with 1200 although this clogged very easily with the fine dust that comes from sanding leather.
When the wheel is filled and sanded smooth as a babies arse all over you'll be ready for paint.
![Firstleatherrefurbpic9_zpsc046b030.jpg Firstleatherrefurbpic9_zpsc046b030.jpg]()
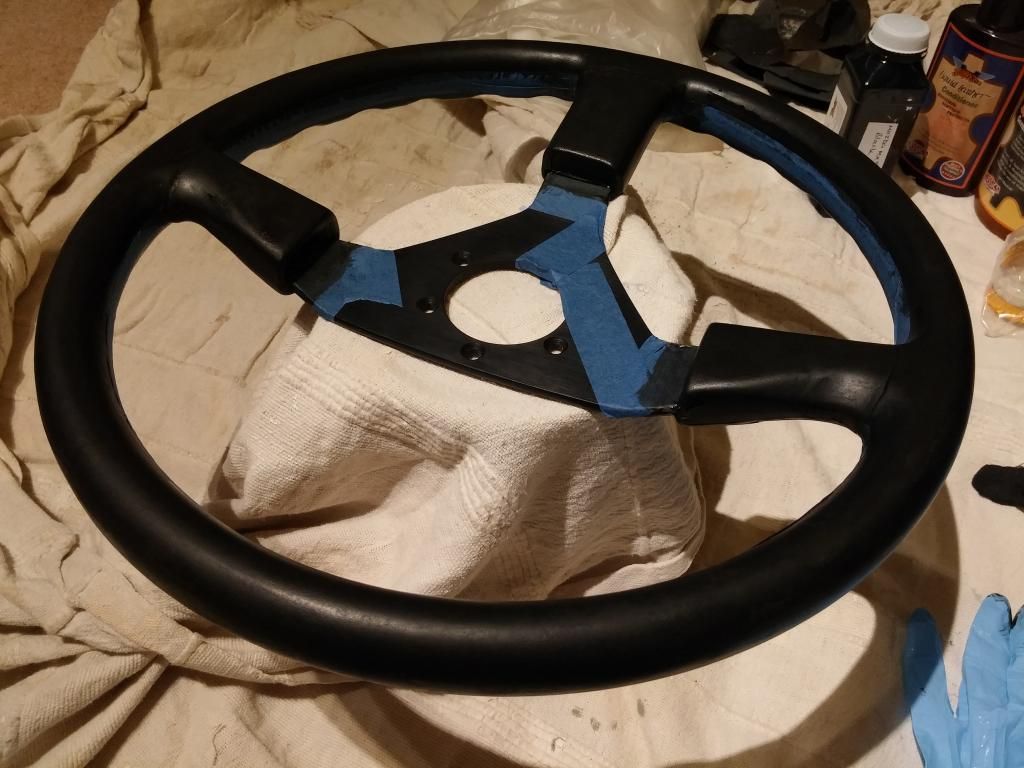
Mask up the stitching and the centre with masking tape, get the tape as small over the stitching as you can.
The paint is Gliptone leather restorer from here: http://www.liquidleather.com/scuffs.htm Excellent stuff. There's hundreds of colours, this one is Mazda '92 Black, a slightly blue-black as it turned out.
You can spray the surface on (as they were originally) but as I don't have a hobby airbrush I used gloves and cotton balls. There's a good reason for using these, they are smoother than a paint brush and each coat you do you can throw away the cotton ball. They get clagged up with paint and sticky so use gloves! and keep using a new one, every coat.
Do thin coats just brushing over the surface very lightly, this leaves no brush strokes and the final surface will be much tougher with several thin coats. This is the bit that really took the time as you have to wait several hours between coats, if you don't the new paint takes the layer underneath off.
This is after two coats, I did five coats in total.
![Firstleatherrefurbpic10_zpsd506de35.jpg Firstleatherrefurbpic10_zpsd506de35.jpg]()
Then the finished result, I buffed up the final coat with a soft micro-fibre cloth and now it has a nice satin sheen to it very much like a new wheel, it even feels like a new wheel to use.
![Firstleatherrefurbpicfinal_zps5f7f5ff5.j Firstleatherrefurbpicfinal_zps5f7f5ff5.j]()
It'll get shinier in use as the original surface did, but you can always re-coat again if this happens in a year or two.
Enjoy.
To do this job you have to take the wheel off the car.
Here's my wheel to begin with, I bought it for £25 to practice on. It has all the usual gouges scratches and dents you'd expect, it's also worn very shiny and the surface was missing altogether in places.

First thing to do is to sand the existing surface back, it seems pretty strange sanding leather to begin with but all leather you see is 'painted' and refurbing it is a lot like doing bodywork. i.e. you sand, fill, sand, paint. You don't have to take all the surface off completely we're just aiming for smoothness.
I started with 800 grade paper, you don't want to scratch the surface deeply with coarse paper as it'll 'chunk up' and be rough, instead sand lightly and try to get it all smooth and even. Always sand leather dry.
Sanding brings out further imperfections and some small dents you can't see normally.

When it's all sanded and you can see the dents clearly, use some leather filler to fill the dents in. This is like normal filler except it always stays as flexible as the leather, clever stuff. http://www.amazon.co.uk/Leather-Repair-Filler-Compound-Cracks/dp/B00BNT6UME
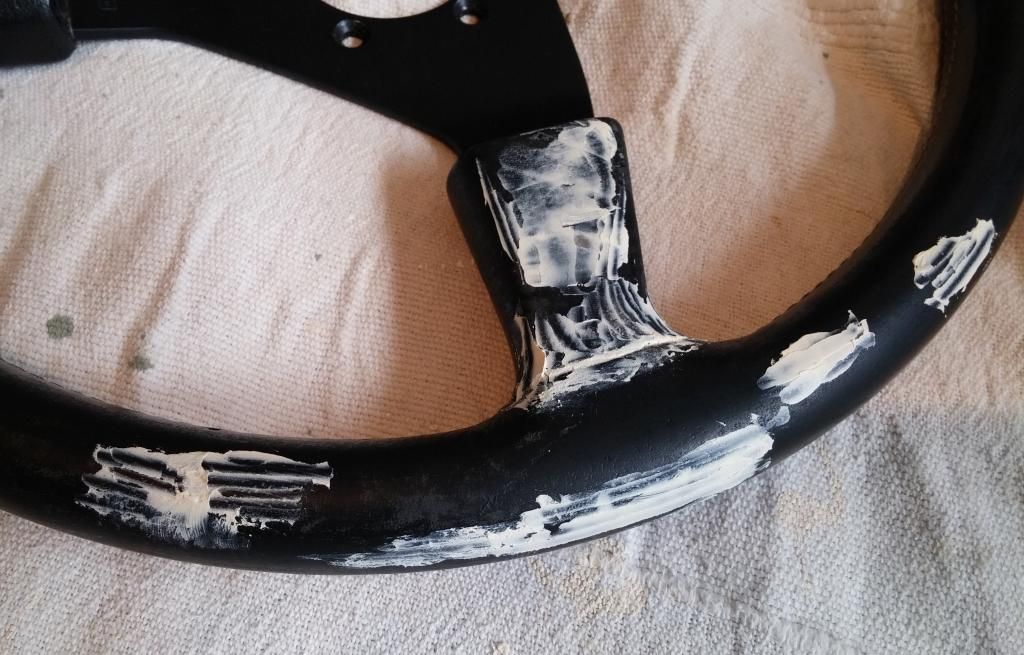
Sand this down and blend it into it's surrounding surface.
Up the grade of the paper you're using for a final sand, I ended up with 1200 although this clogged very easily with the fine dust that comes from sanding leather.
When the wheel is filled and sanded smooth as a babies arse all over you'll be ready for paint.
Mask up the stitching and the centre with masking tape, get the tape as small over the stitching as you can.
The paint is Gliptone leather restorer from here: http://www.liquidleather.com/scuffs.htm Excellent stuff. There's hundreds of colours, this one is Mazda '92 Black, a slightly blue-black as it turned out.
You can spray the surface on (as they were originally) but as I don't have a hobby airbrush I used gloves and cotton balls. There's a good reason for using these, they are smoother than a paint brush and each coat you do you can throw away the cotton ball. They get clagged up with paint and sticky so use gloves! and keep using a new one, every coat.
Do thin coats just brushing over the surface very lightly, this leaves no brush strokes and the final surface will be much tougher with several thin coats. This is the bit that really took the time as you have to wait several hours between coats, if you don't the new paint takes the layer underneath off.
This is after two coats, I did five coats in total.
Then the finished result, I buffed up the final coat with a soft micro-fibre cloth and now it has a nice satin sheen to it very much like a new wheel, it even feels like a new wheel to use.

It'll get shinier in use as the original surface did, but you can always re-coat again if this happens in a year or two.
Enjoy.


