Mx5 mk2 After market momo boss fitment
this is a guide to what i did, i take no responsibility for the consequences if this doesnt work for you
some of the photos are mine some are not, i fitted my boss then wrote this guide. hope it helps!
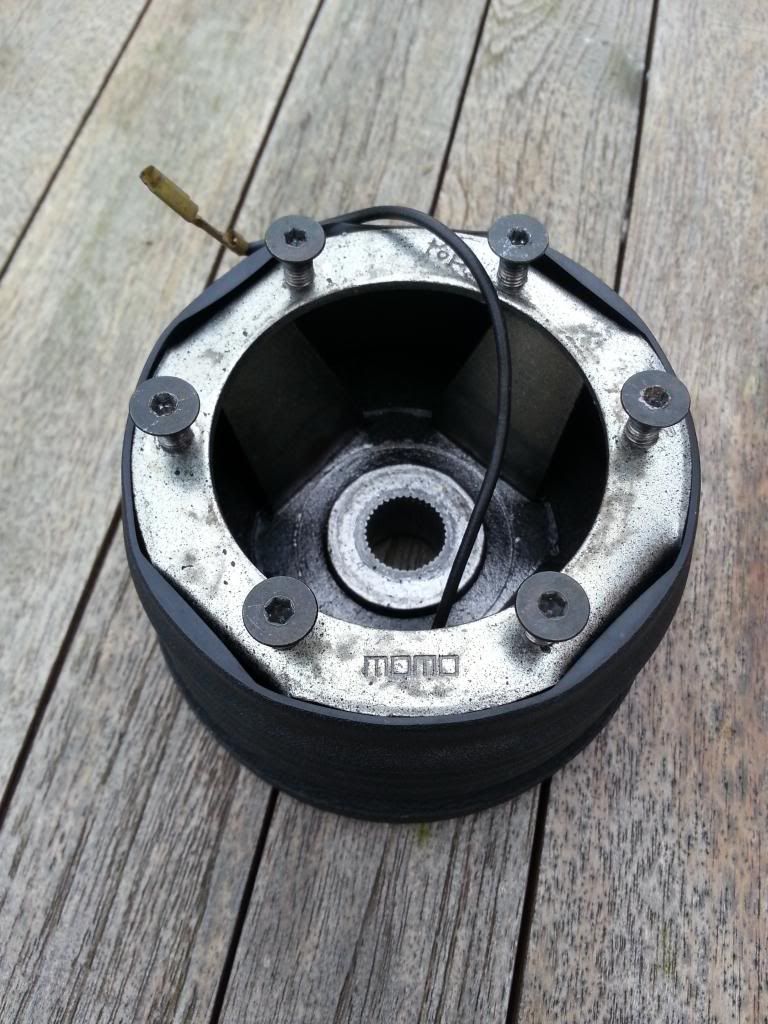
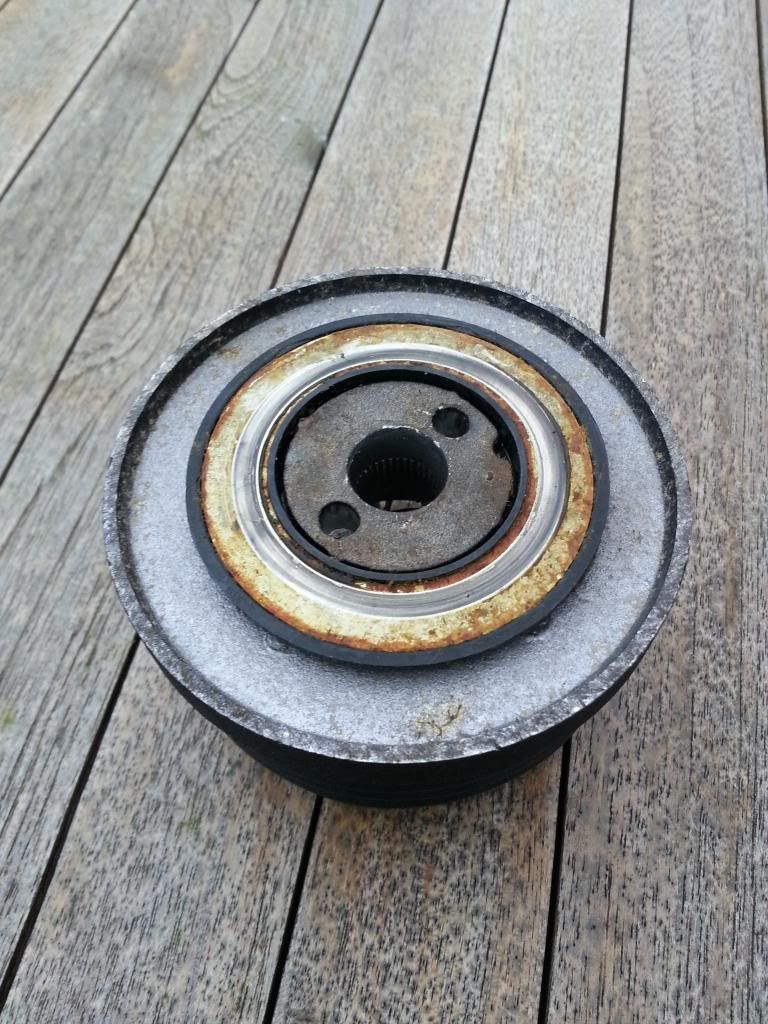
here's the momo boss - this is actually a standard mk1 momo boss
1. The first step is going to be prepairing the car, its best to do this on a level surface and to make sure the wheels are facing straight forward. Missing this out will result in a wonky steering wheel.
2. Next you're going to want to disconnect the battery and go and make a cup of tea. Wait at least 10-15 minutes for the power to drain in the car as you don't want the airbag going off in your face.
3. There are 2 10mm bolts to remove from either side of the standard steering wheel, one on the left and one on the right. Once these have been removed the airbag device should be free and able to pull away, you will need to unplug the airbag (yellow plug) and unplug the horn wire (red plug/wire).
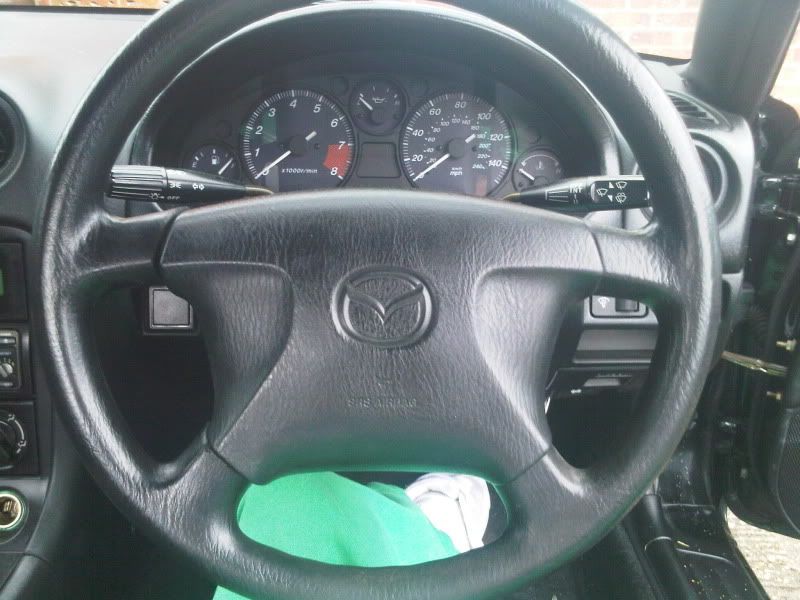
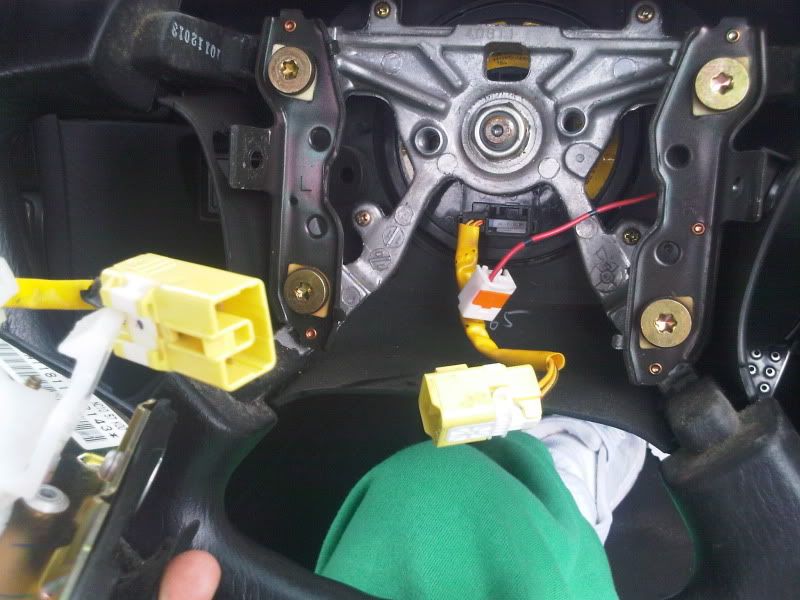
4. You should now have an airbag-less wheel, in the centre you should see a 21mm nut which you should loosen but not remove completely. When the nut is loose you can pull on the original wheel to help remove it (it may be a little tough), leaving the nut on will stop the wheel flying off and hitting you in the face.
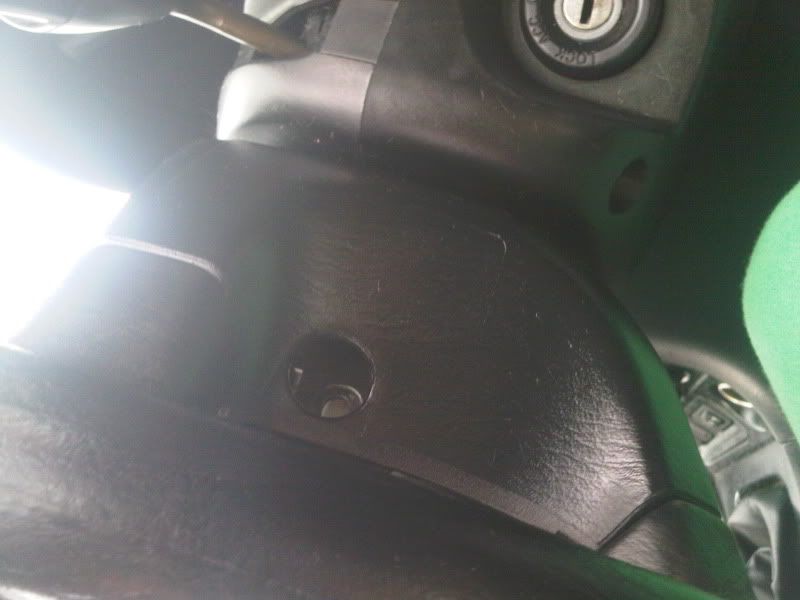
5. Now to remove the plastic shrouding which surrounds the steering column and ignition barrel. There are three screws on the underside, remove these and the plastics should unclip from eachother.
6. You should now be able to see the clock spring housing (black circular object with yellow stickers) we will need to remove this as well. There are 3 screws holding this in so go ahead and remove all 3 screws but pay attention to the bottom right screw hole, this will come in handy later. Once the screws are removed go ahead and again unplug the clock spring mechanism. Again you will notice two plugs one yellow (air bag) and a green (horn).
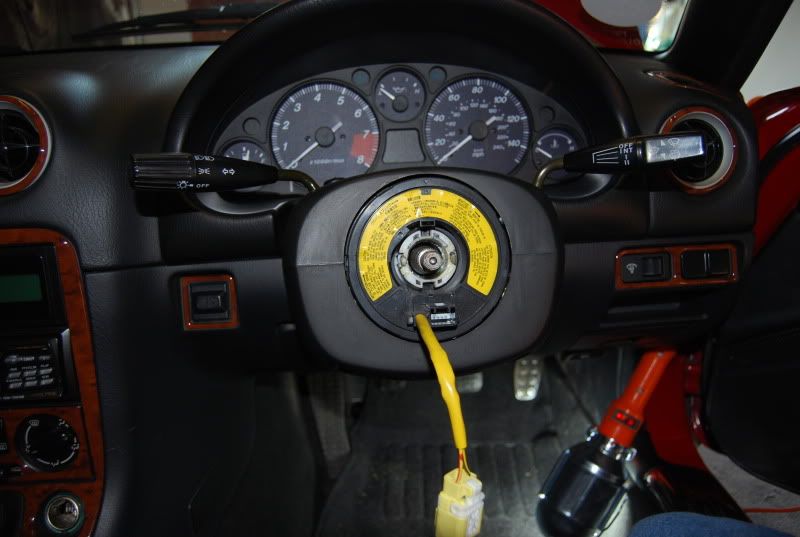
this picture is an example, ignore the missing center of the clock spring. this shows the location of the 3 screws you need to remove
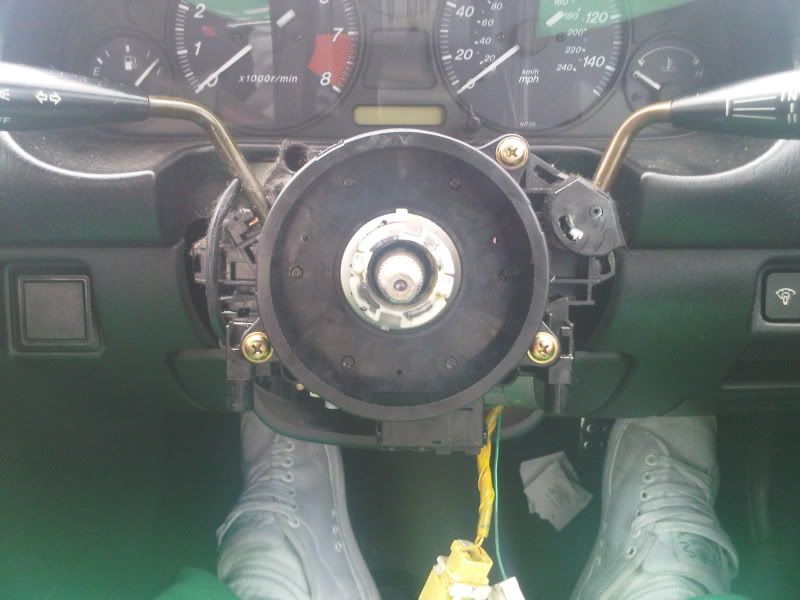
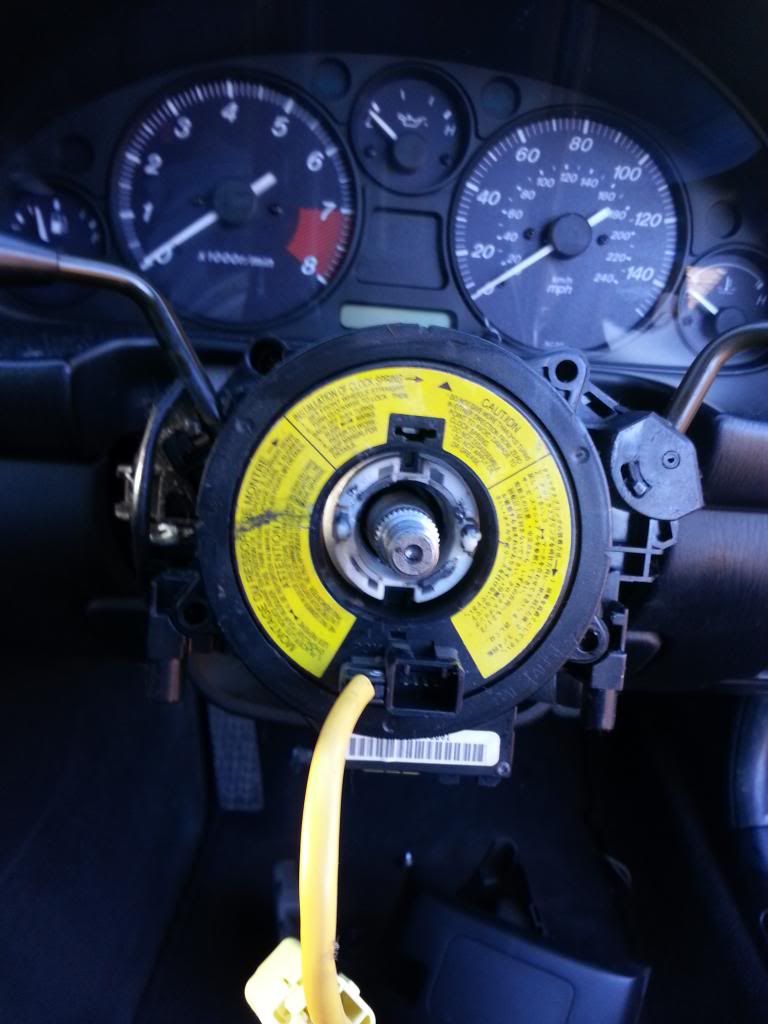
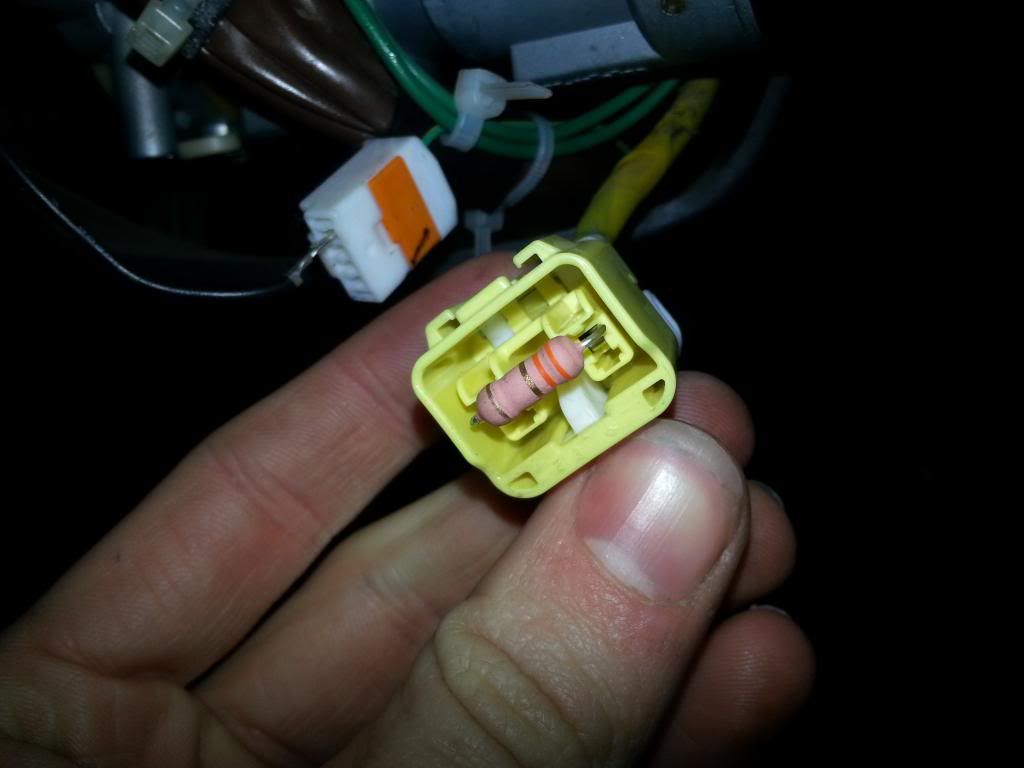
7. At this point you can choose to trick the airbag light or remove the light bulb. To trick the airbag light you will need to plug in the 3ohm resistor into the yellow airbag plug terminals - easy!
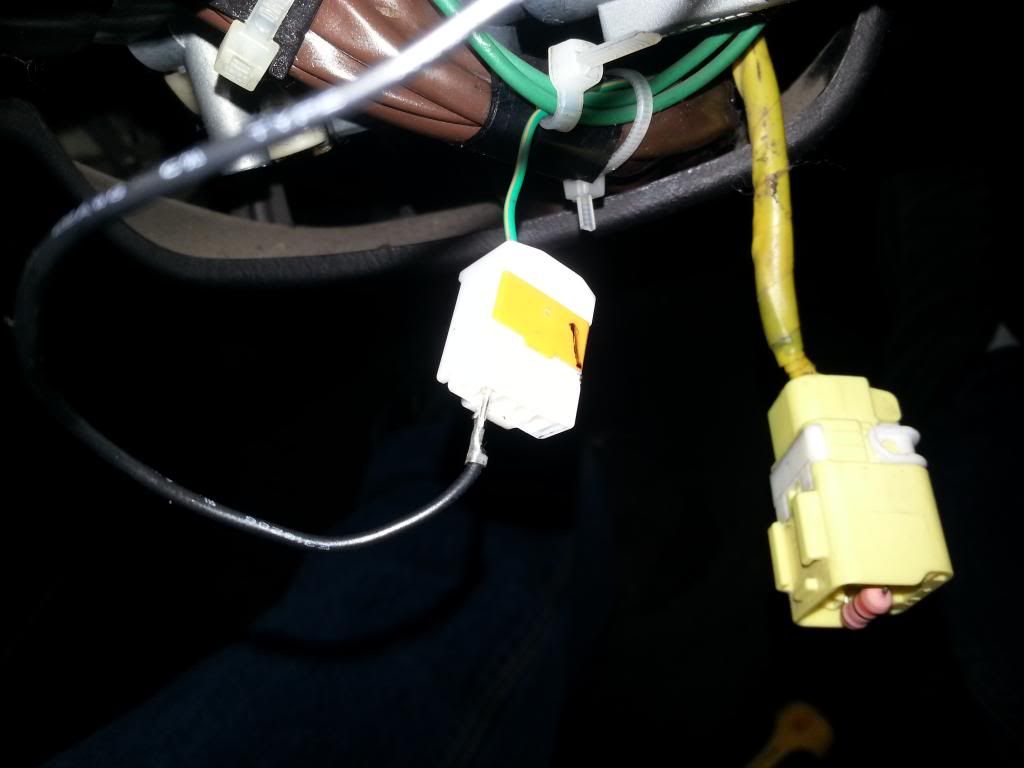
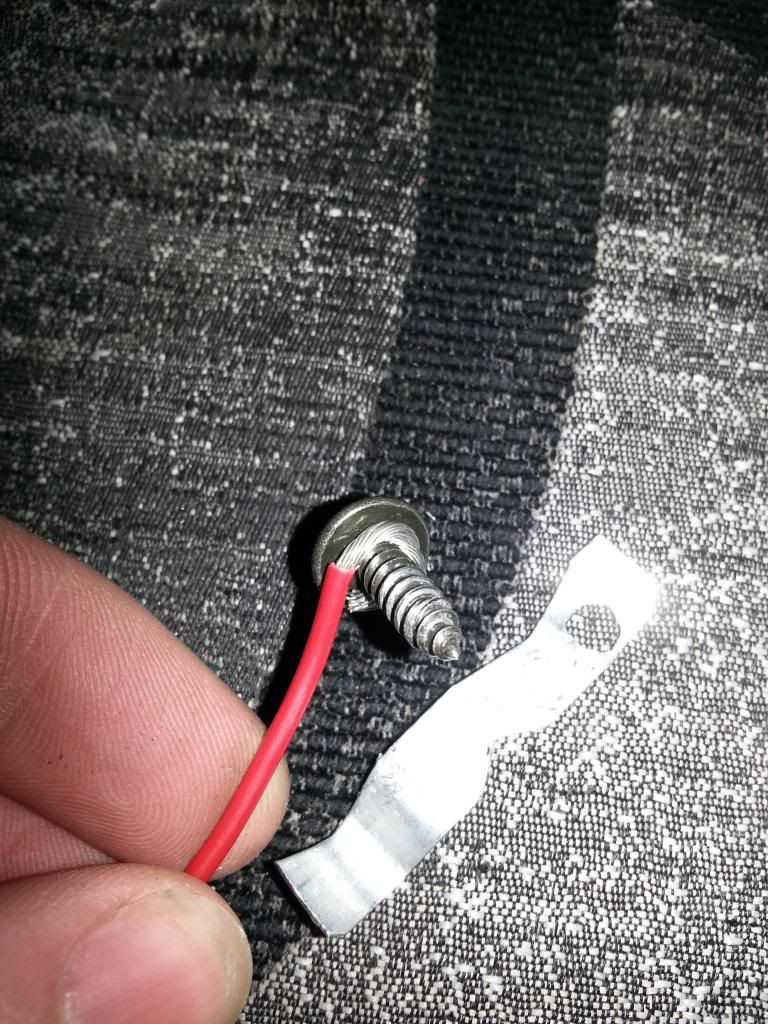
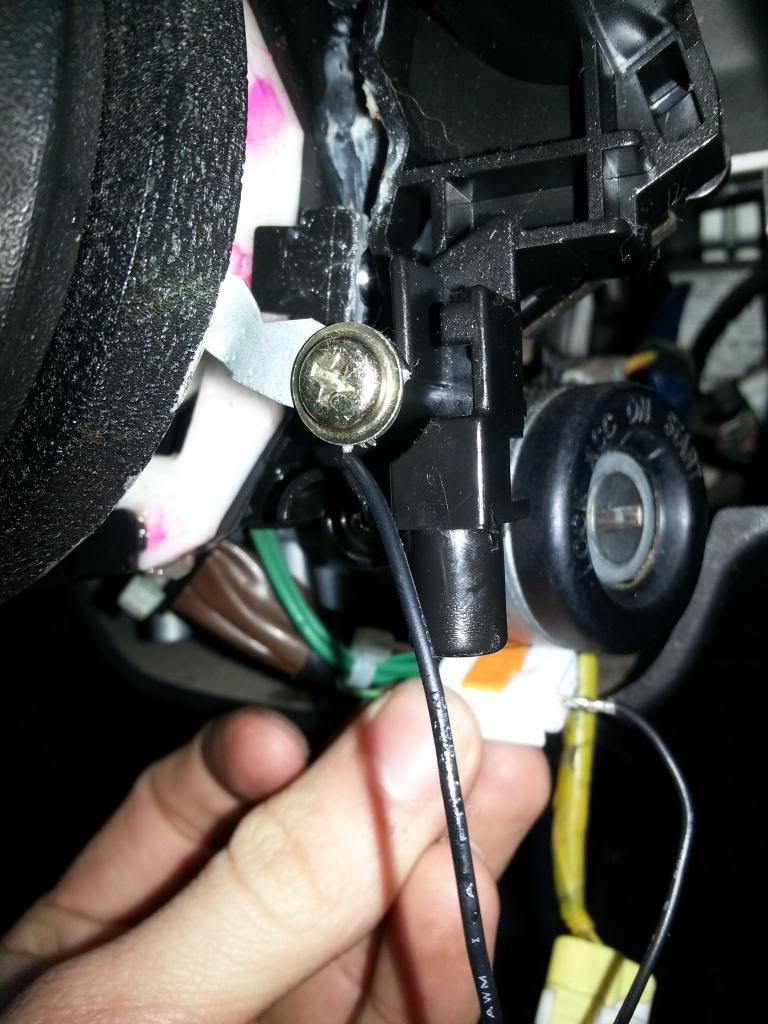
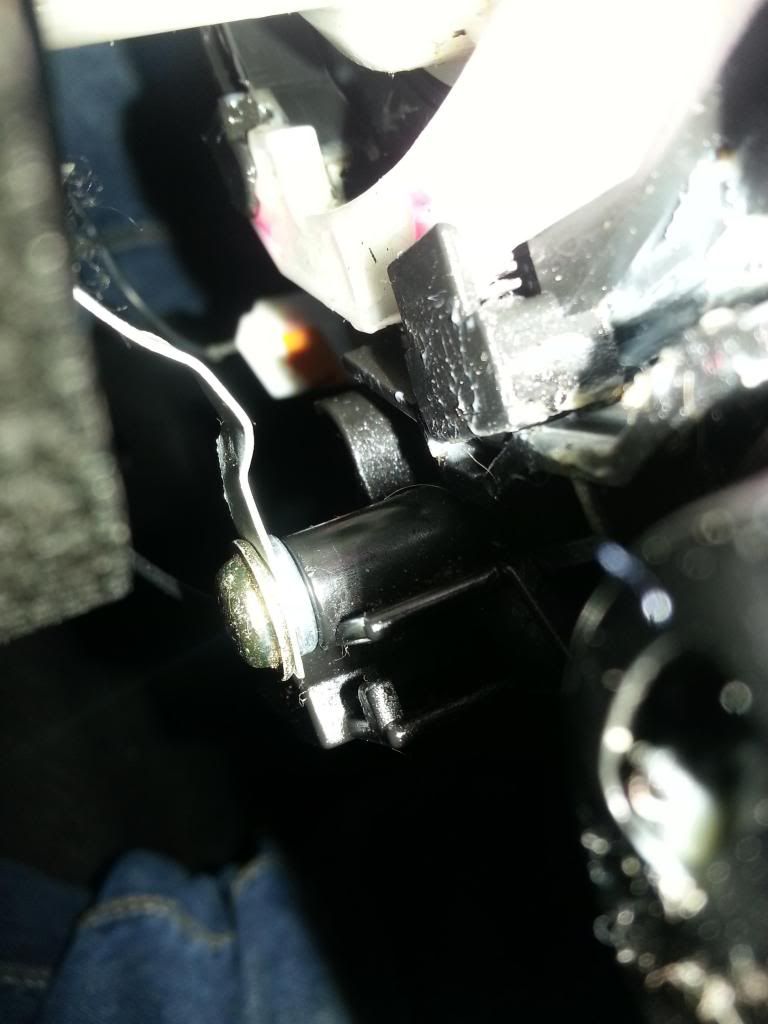
8. For the horn you will need to put a piece of wire which has been soldered (helps with rigidity) into the same terminal of the plug as the current horn wire, the wire needs to be around 14cm. Once done you will need a small strip of metal about 5cm long (strong but able to bend) and to drill a 3-4mm hole in one end. Slightly bend a raised U or V shape in one end - this will help to make contact with the brass ring on the boss. Remember the clock spring mounting hole? Take one of the screws which you removed from the clock spring housing and place the metal strip over the bottom right hole from the clock spring mount and begin to screw this down - don't go all the way in. Take the wire which you made for the horn and wrap the free end around the screw thread, make sure the metal strip is at a rough 90 degree angle and fully tighten the screw.
here's the wire connected to the horn plug
this is the metal strip i used
this is the wire wrapped around the screw and placed through the hole in the metal strip
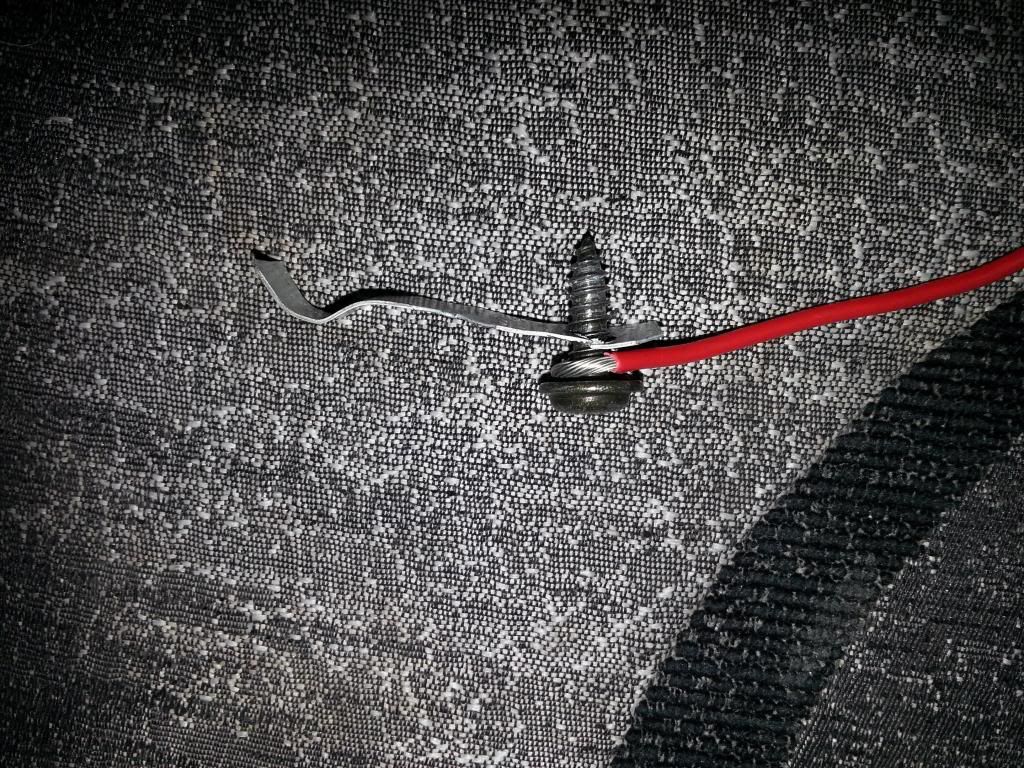
here's the wire screwed in position with wire attached
9. Ready to fit the boss! You should see a white protruding object in the centre of the steering column. This is the turn signal canceller. Note the two point bits, these will sit inside the rear of the boss. You will need to turn this to rough 90 degrees to match up to the boss, in doing this your indicators wont cancel out at the normal positions they will be slightly off.
10. Once lined up start to slide the boss on to the splined shaft, note the 6 holes on the front of the boss - offer up your wheel to see if its straight or not. It may need rotating to be completely straight. If happy slide the boss on and see that the metal strip you made for the horn makes contact with the brass ring on the boss. If all is ok and the wheels are still straight go ahead and refit the 21mm nut and begin to tighten.
11. Refit the plastic shrouding which you removed in step 5. offer the plastics up, clip them together and replace the screws int he under side. to tidy things up you can stick on some audio carpeting, with the airbag and horn plug just tuck these out of the way.
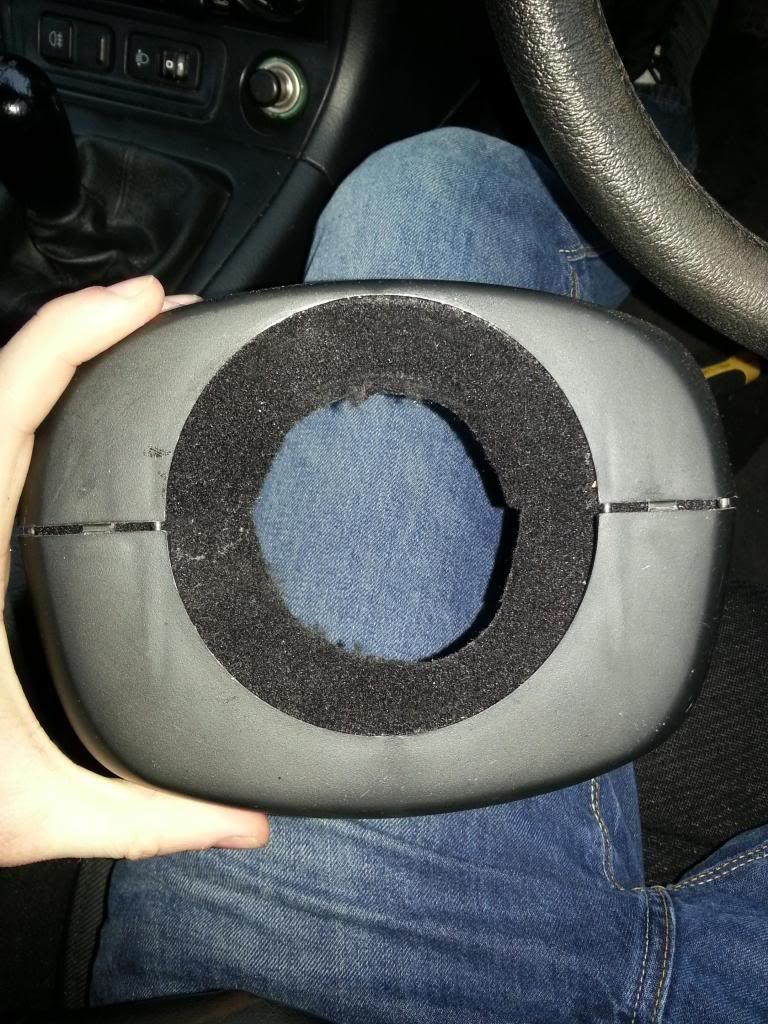
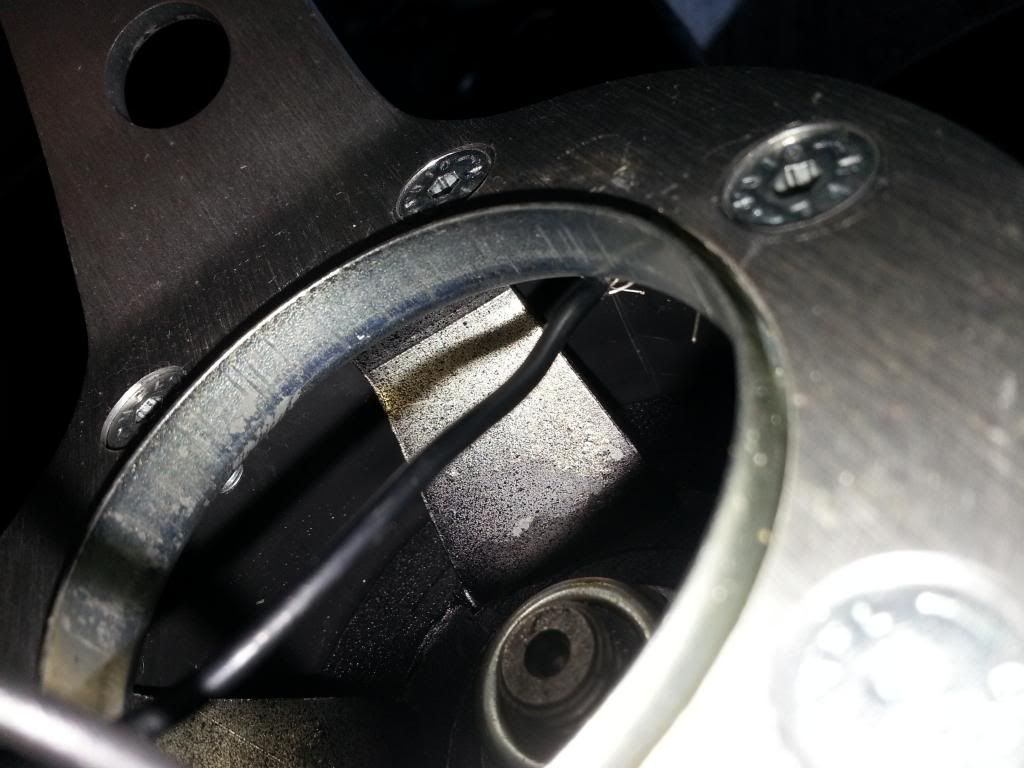
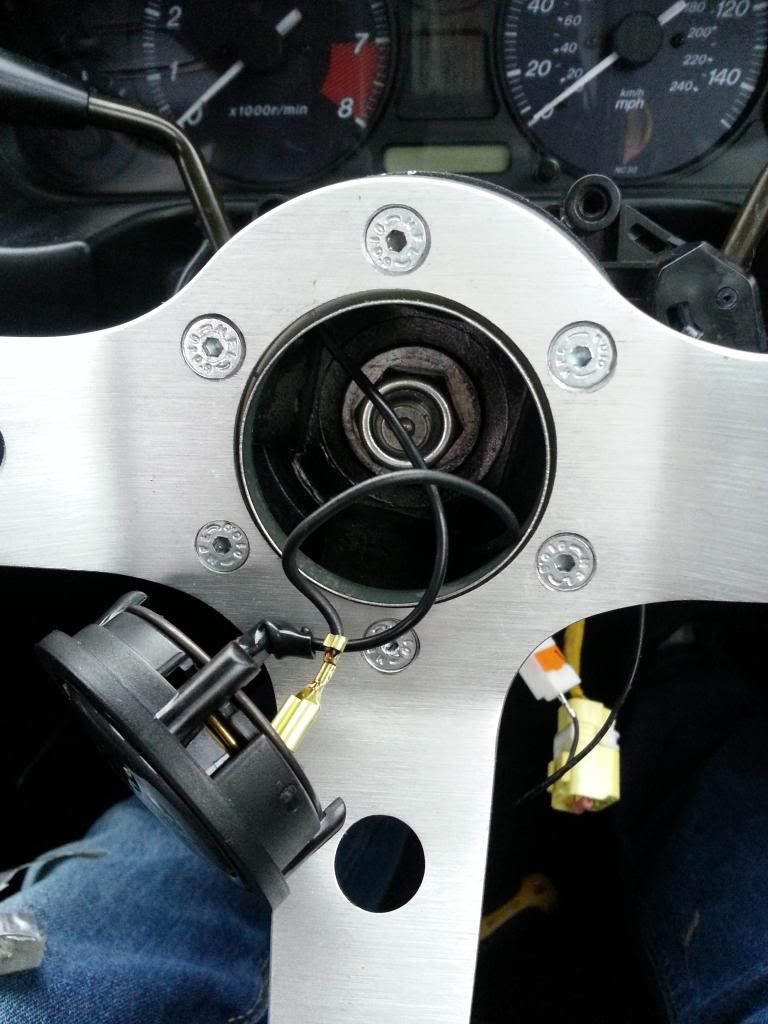
12. Ready to fit the steering wheel! Line up the steering wheel and horn ring with the boss mounting holes and finger tighten the 6 screws into place. On the horn button you may have two terminals - a positive and a negative, the positive wire should be sitting inside of the boss housing. We will need to connect a negative wire, I found it best to take a small length of wire about 4-5cm and strip either end to reveal bare wire. You're going to want to sandwich one end of the wire between the boss and steering wheel, once done finish tightening the screws on the steering wheel. Now the wheel is attached you have something to grab hold of, go ahead and tighten the 21mm nut while pulling in the opposite direction on the wheel. Once satisfied this is tight go ahead and fit the horn button, hook up the positive wire to the positive terminal and the negative wire to the negative terminal.
here's the negative wire sandwiched between the wheel and boss
connect pos and neg
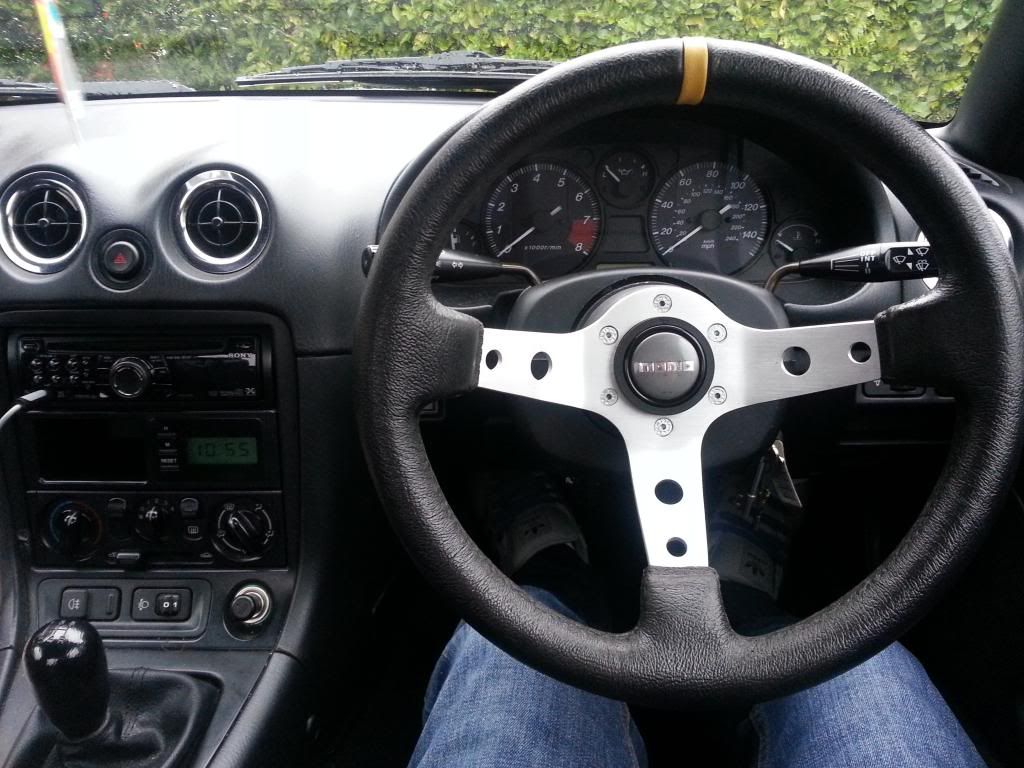
13. Youre nearly done! Now to reconnect the battery and test out your new horn and airbag bypass. If all is good the airbag light will come on for a few seconds and go out again.
You're done, enjoy the awesomeness!
this is a guide to what i did, i take no responsibility for the consequences if this doesnt work for you
some of the photos are mine some are not, i fitted my boss then wrote this guide. hope it helps!
here's the momo boss - this is actually a standard mk1 momo boss


1. The first step is going to be prepairing the car, its best to do this on a level surface and to make sure the wheels are facing straight forward. Missing this out will result in a wonky steering wheel.
2. Next you're going to want to disconnect the battery and go and make a cup of tea. Wait at least 10-15 minutes for the power to drain in the car as you don't want the airbag going off in your face.
3. There are 2 10mm bolts to remove from either side of the standard steering wheel, one on the left and one on the right. Once these have been removed the airbag device should be free and able to pull away, you will need to unplug the airbag (yellow plug) and unplug the horn wire (red plug/wire).


4. You should now have an airbag-less wheel, in the centre you should see a 21mm nut which you should loosen but not remove completely. When the nut is loose you can pull on the original wheel to help remove it (it may be a little tough), leaving the nut on will stop the wheel flying off and hitting you in the face.
5. Now to remove the plastic shrouding which surrounds the steering column and ignition barrel. There are three screws on the underside, remove these and the plastics should unclip from eachother.
6. You should now be able to see the clock spring housing (black circular object with yellow stickers) we will need to remove this as well. There are 3 screws holding this in so go ahead and remove all 3 screws but pay attention to the bottom right screw hole, this will come in handy later. Once the screws are removed go ahead and again unplug the clock spring mechanism. Again you will notice two plugs one yellow (air bag) and a green (horn).

this picture is an example, ignore the missing center of the clock spring. this shows the location of the 3 screws you need to remove


7. At this point you can choose to trick the airbag light or remove the light bulb. To trick the airbag light you will need to plug in the 3ohm resistor into the yellow airbag plug terminals - easy!

8. For the horn you will need to put a piece of wire which has been soldered (helps with rigidity) into the same terminal of the plug as the current horn wire, the wire needs to be around 14cm. Once done you will need a small strip of metal about 5cm long (strong but able to bend) and to drill a 3-4mm hole in one end. Slightly bend a raised U or V shape in one end - this will help to make contact with the brass ring on the boss. Remember the clock spring mounting hole? Take one of the screws which you removed from the clock spring housing and place the metal strip over the bottom right hole from the clock spring mount and begin to screw this down - don't go all the way in. Take the wire which you made for the horn and wrap the free end around the screw thread, make sure the metal strip is at a rough 90 degree angle and fully tighten the screw.
here's the wire connected to the horn plug

this is the metal strip i used

this is the wire wrapped around the screw and placed through the hole in the metal strip

here's the wire screwed in position with wire attached


9. Ready to fit the boss! You should see a white protruding object in the centre of the steering column. This is the turn signal canceller. Note the two point bits, these will sit inside the rear of the boss. You will need to turn this to rough 90 degrees to match up to the boss, in doing this your indicators wont cancel out at the normal positions they will be slightly off.
10. Once lined up start to slide the boss on to the splined shaft, note the 6 holes on the front of the boss - offer up your wheel to see if its straight or not. It may need rotating to be completely straight. If happy slide the boss on and see that the metal strip you made for the horn makes contact with the brass ring on the boss. If all is ok and the wheels are still straight go ahead and refit the 21mm nut and begin to tighten.
11. Refit the plastic shrouding which you removed in step 5. offer the plastics up, clip them together and replace the screws int he under side. to tidy things up you can stick on some audio carpeting, with the airbag and horn plug just tuck these out of the way.

12. Ready to fit the steering wheel! Line up the steering wheel and horn ring with the boss mounting holes and finger tighten the 6 screws into place. On the horn button you may have two terminals - a positive and a negative, the positive wire should be sitting inside of the boss housing. We will need to connect a negative wire, I found it best to take a small length of wire about 4-5cm and strip either end to reveal bare wire. You're going to want to sandwich one end of the wire between the boss and steering wheel, once done finish tightening the screws on the steering wheel. Now the wheel is attached you have something to grab hold of, go ahead and tighten the 21mm nut while pulling in the opposite direction on the wheel. Once satisfied this is tight go ahead and fit the horn button, hook up the positive wire to the positive terminal and the negative wire to the negative terminal.
here's the negative wire sandwiched between the wheel and boss

connect pos and neg


13. Youre nearly done! Now to reconnect the battery and test out your new horn and airbag bypass. If all is good the airbag light will come on for a few seconds and go out again.
You're done, enjoy the awesomeness!


